Instalasi ILDIS
Instalasi ILDIS pada halaman ini paling menggambarkan kondisi instalasi pada lingkungan pengembangan (development). Namun section instalasi manual terutama pada Sistem Operasi Ubuntu dapat mewakili kondisi lingkungan production. Anda dapat langsung ke bagian instalasi manual jika anda ingin segera memasang ILDIS pada lingkunga production lalu melihat referensi konfigurasi yang direkomendasikan pada halaman deployment.
Unduh ILDIS
Section titled “Unduh ILDIS”Git Clone
Section titled “Git Clone”Untuk mengunduh ILDIS anda dapat melakukan clone repositori ildis menggunakan perintah berikut :
git clone https://github.com/bphndigitalservice/ildis.gitEkstrak Manual
Section titled “Ekstrak Manual”Anda juga dapat mengunduh rilis terakhir ILDIS pada website di sini
Vagrant
Section titled “Vagrant”ILDIS dapat dipasang pada berbagai macam sistem operasi seperti Linux, Windows, atau macOS. Pada tahap development kami menyarankan anda untuk menggunakan Vagrant.
Instalasi ILDIS dengan menggunakan vagrant adalah cara yang paling mudah dan cepat. Namun sebelum itu pastikan terlebih dahulu bahwa pada perangkat anda telah terpasang Vagrant dan VirtualBox.
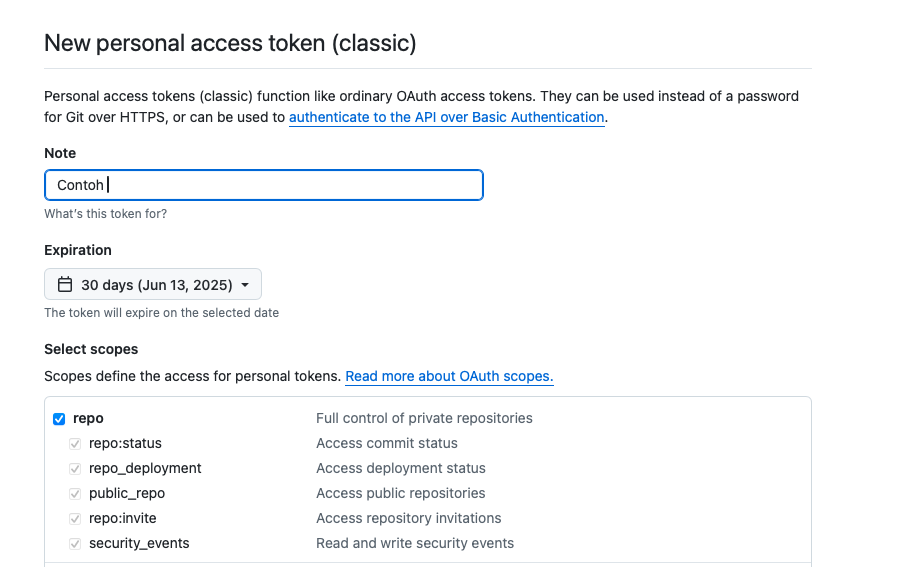
PERTHATIAN!! Sebelum itu anda harus membuat Github Personal Token terlebih dahulu di sini. Pada halaman tersebut anda dapat memilih Generate New Token lalu pilih Generate new token (classic) dan pilih Expiration sesuai kebutuhan anda. Centang repo seperti pada gambar :

Selanjutnya copy Personal Access Token Tersebut ke file vagrant/config/vagrant-local.yml pada bagian github_token :
# Your personal GitHub tokengithub_token: <your personal access token># Read more: https://github.com/blog/1509-personal-api-tokens# You can generate it here: https://github.com/settings/tokens
# Guest OS timezonetimezone: Asia/Jakarta
# Are we need check box updates for every 'vagrant up'?box_check_update: false
# Virtual machine namemachine_name: ildis4
# Virtual machine IPip: 192.168.83.137
# Virtual machine CPU cores numbercpus: 1
# Virtual machine RAMmemory: 1024
Setelah itu anda dapat mengeksekusi perintah berikut :
vagrant upBerikut adalah contoh proses booting virtual machine dengan perintah vagrant up berhasil :

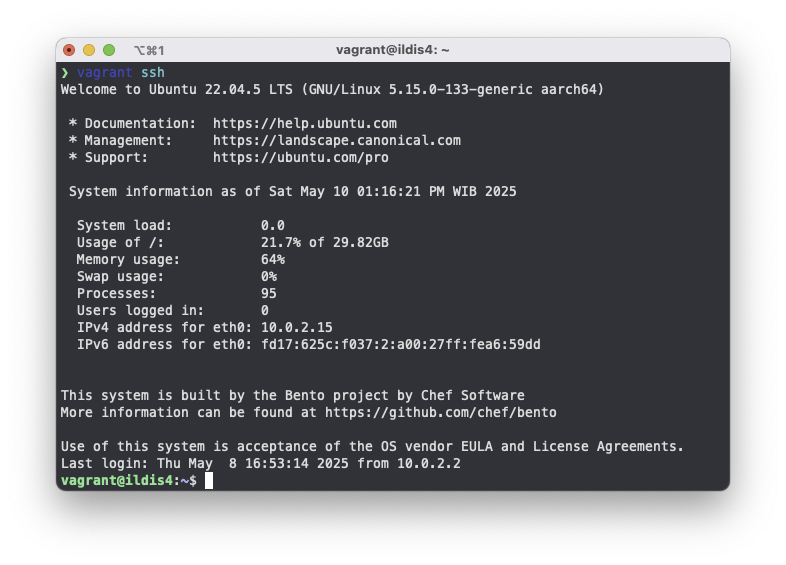
Jika virtual machine sudah berjalan, selanjutnya adalah masuk ke virtual machine menggunakan ssh dengan perintah berikut:
vagrant sshMaka anda akan masuk ke dalam virtual machine dengan ildisv4 seperti contoh berikut:

Selanjutnya adalah melakukan setup project ILDIS dengan perintah berikut :
cd /app && composer install && php initJika semua proses sudah selesai selanjutnya anda dapat melakukan konfigurasi ILDIS pada file .env. Sebelum itu copy terlebih dahulu file konfigurasi contoh dengan perintah berikut:
cp .env.example .envSetelah itu anda dapat mengubah konfigurasi file .env sesuai dengan kebutuhan anda. Berikut adalah isi dari file konfigurasi:
#  Environment configuration file for the application.YII_ENV=prodYII_DEBUG=true
#  Database configurationDB_HOST=localhostDB_USER=rootDB_PASSWORD=DB_DATABASE=ildis_v4DB_DATABASE_PORT=3306
PUBLIC_DOMAIN=http://ildis-frontend.test
#  Cookie validation keys for different environmentsCOOKIE_VALIDATION_KEY_BE=COOKIE_VALIDATION_KEY_FE=
# reCAPTCHA configurationRECAPTCHA_SITE_KEY=RECAPTCHA_SECRET_KEY=
Jika semua konfigurasi sudah selesai, buat database dengan nama sesuai dengan yang anda buat pada file konfigurasi. Di sini misalnya ildis_v4:
mysql -u rootLalu buat database dengan perintah berikut:
create database ildis_v4; //tekan enterexit;Selanjutnya anda dapat melakukan migrasi database dengan perintah berikut:
mysql -u root ildis_v4 < /app/DATABASE/ildis_v4.sqlJika semua berjalan dengan baik maka anda dapat mengakses laman ILDIS pada :
- http://ildis-frontend.test (untuk frontend)
- http://ildis-backend.test (untuk halaman admin)
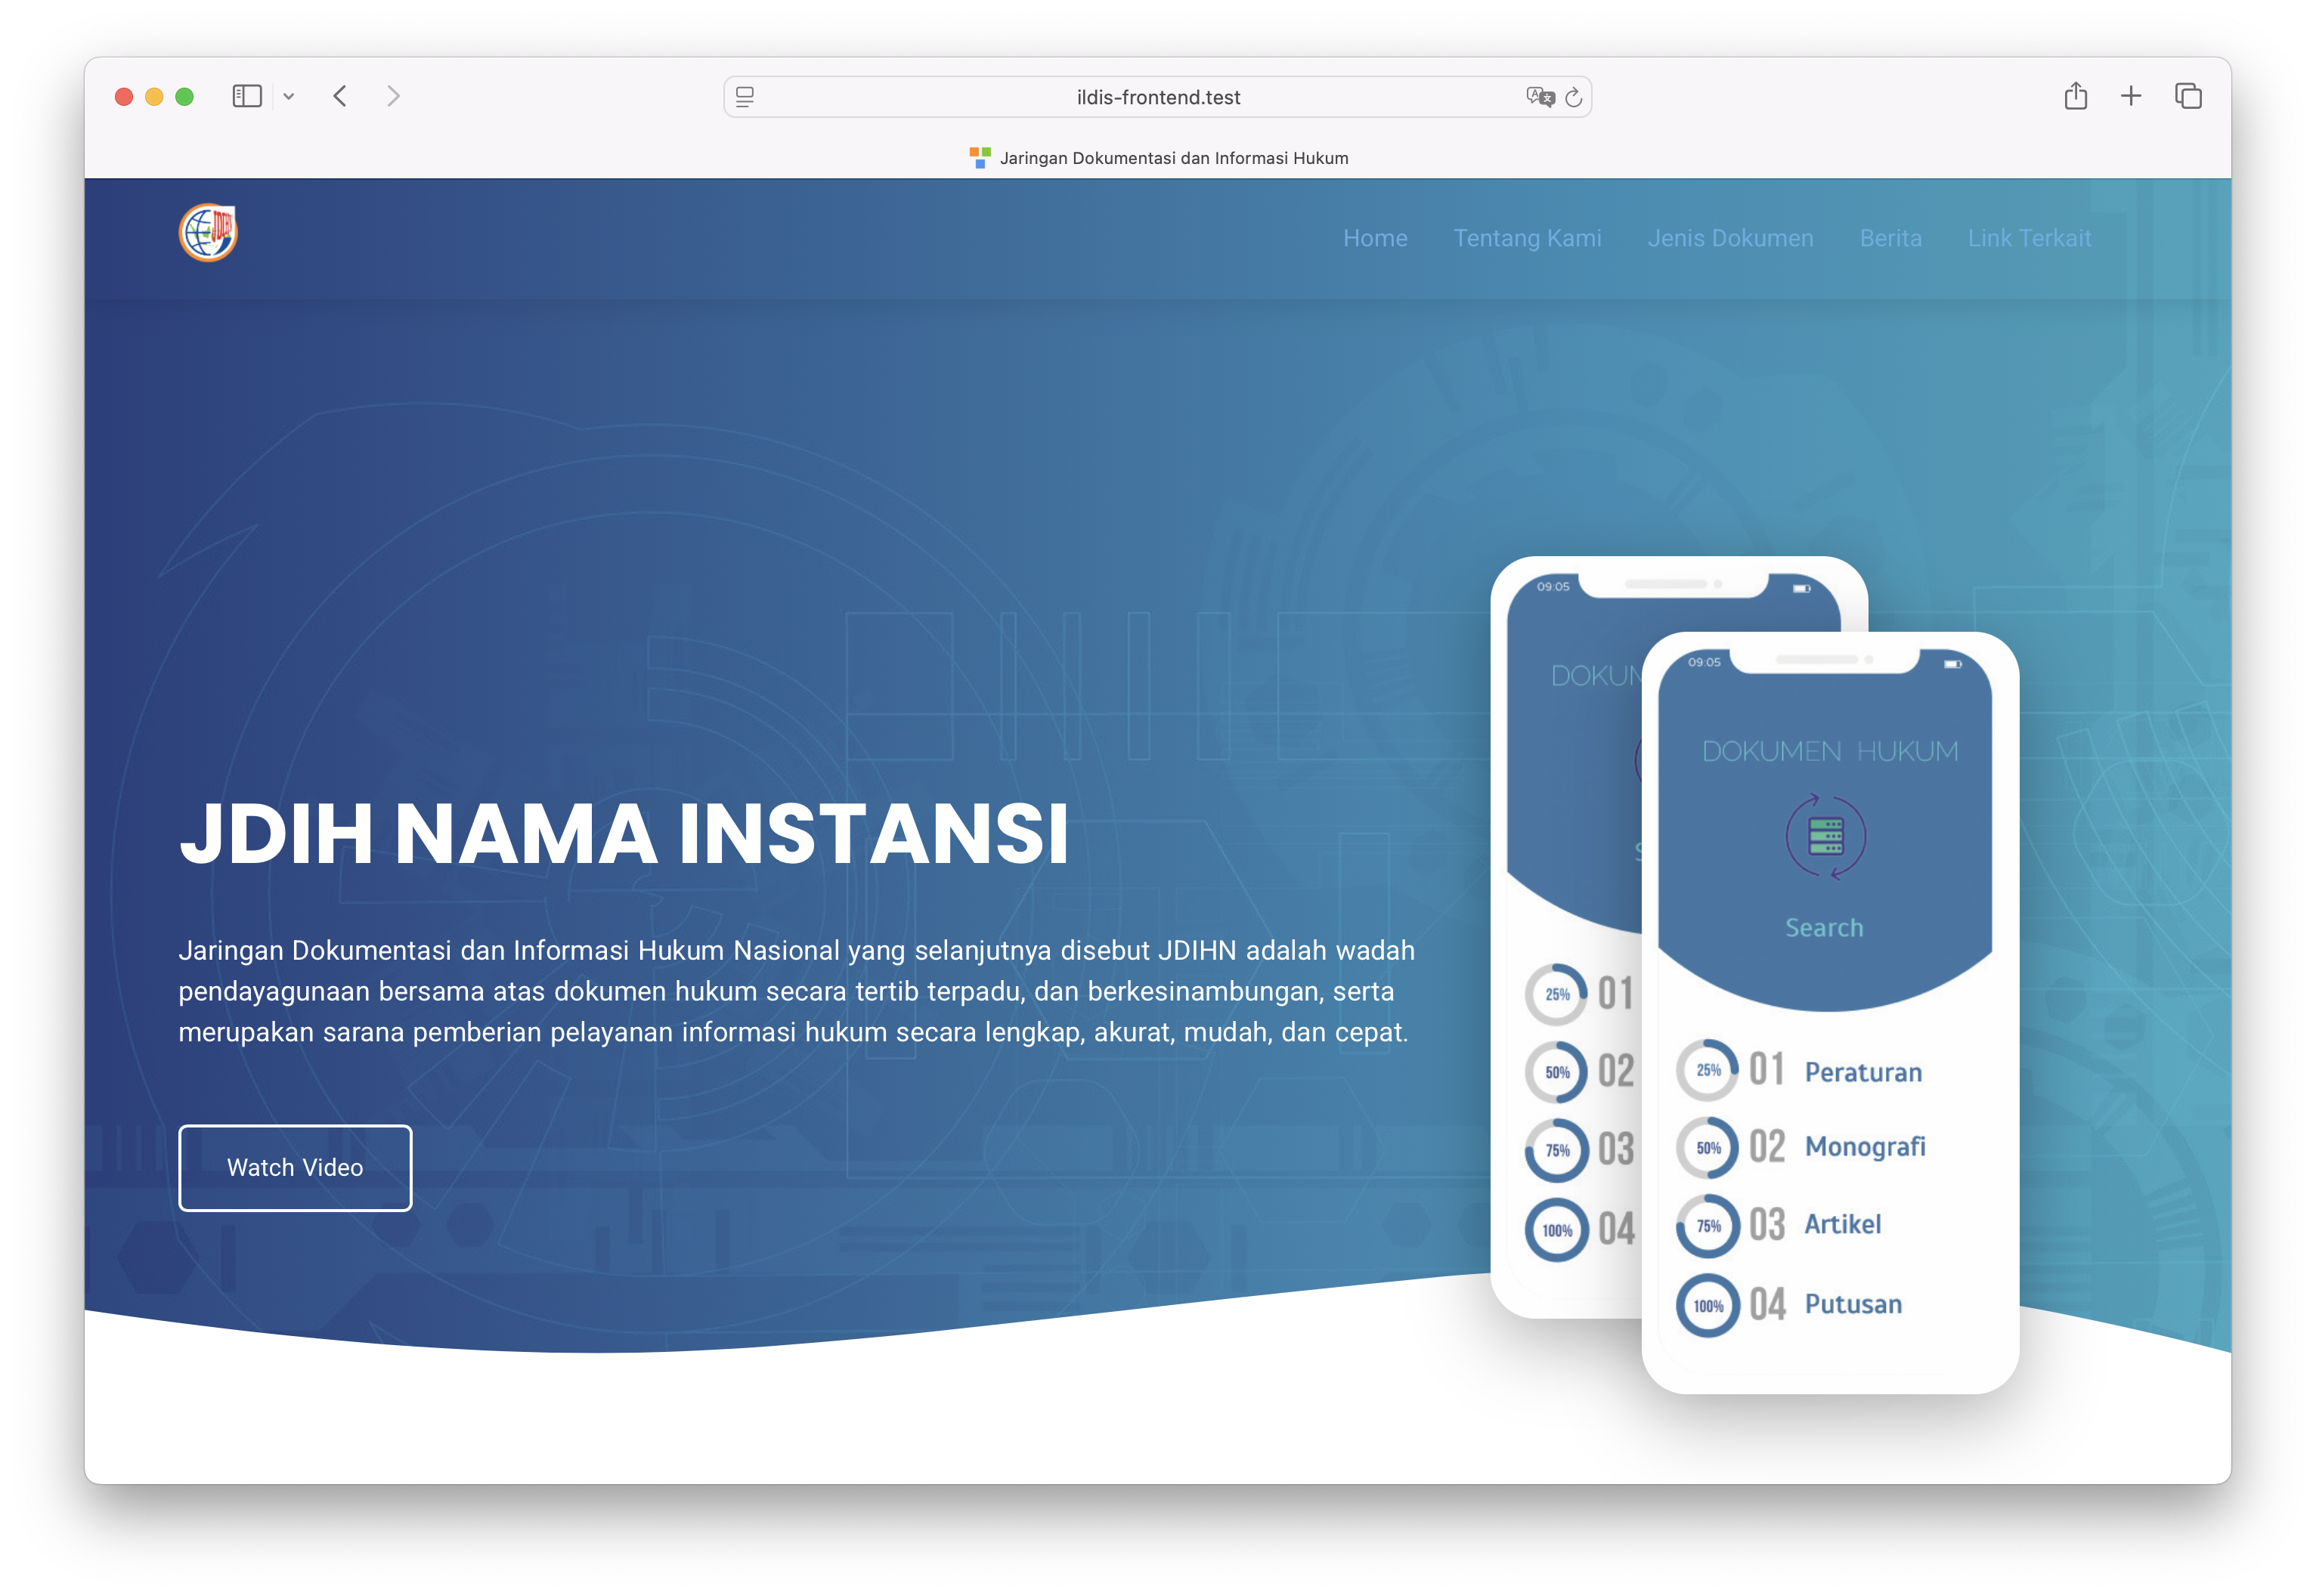
Jika semua berjalan lancar maka anda akan mendapatkan tampilan seperti ini :

Instalasi Manual (Tanpa Vagrant)
Section titled “Instalasi Manual (Tanpa Vagrant)”Jika Anda tidak ingin menggunakan Vagrant, ILDIS dapat dipasang secara manual pada sistem Anda. Namun perlu dipahami bahwa instalasi manual membutuhkan pemahaman dasar tentang konfigurasi server web (Apache/Nginx), virtual host, serta permission file dan folder.
Bagian ini menjelaskan cara instalasi manual pada lingkungan :
- Windows menggunakan XAMPP
- Linux/macOS menggunakan PHP, Composer, dan MySQL
A. Linux / macOS
Section titled “A. Linux / macOS”1. Instalasi Prasyarat
Section titled “1. Instalasi Prasyarat”brew tap shivammathur/phpbrew install php@7.4 mysql nginx git composerSetelah itu, tambahkan PHP 7.4 ke PATH:
echo 'export PATH="/opt/homebrew/opt/php@7.4/bin:$PATH"' >> ~/.zshrcsource ~/.zshrcsudo add-apt-repository ppa:ondrej/php -ysudo apt-get updatesudo apt install -y php7.4 php7.4-cli php7.4-common php7.4-curl php7.4-mbstring php7.4-intl php7.4-mysql php7.4-xml php7.4-fpm php7.4-gd php7.4-zip php7.4-xdebug unzip nginx mysql-serverCatatan: Jika
add-apt-repositorybelum tersedia, jalankansudo apt-get install software-properties-common.
2. Unduh dan Pasang ILDIS
Section titled “2. Unduh dan Pasang ILDIS”cd /var/wwwgit clone https://github.com/bphndigitalservice/ildis.gitcomposer install --ignore-platform-reqsphp init3. Konfigurasi .env
Section titled “3. Konfigurasi .env”cp .env.example .envEdit file .env:
# Database configurationDB_HOST=localhostDB_USER=rootDB_PASSWORD=yourpasswordDB_DATABASE=ildis_v4DB_DATABASE_PORT=33064. Import Database
Section titled “4. Import Database”mysql -u root -p ildis_v4 < DATABASE/ildis_v4.sql5. Konfigurasi Apache Virtual Host
Section titled “5. Konfigurasi Apache Virtual Host”Buat file:
sudo nano /etc/apache2/sites-available/ildis.conf<VirtualHost *:80> #ganti dengan domain anda ServerName ildis-demo.bphn.go.id
#ErrorLog /var/log/apache2/advanced.local.error.log #CustomLog /var/log/apache2/advanced.local.access.log combined AddDefaultCharset UTF-8
Options FollowSymLinks DirectoryIndex index.php index.html RewriteEngine on
RewriteRule /\. - [L,F]
DocumentRoot /var/www/ildis/ <Directory /var/www/ildis/> AllowOverride none <IfVersion < 2.4> Order Allow,Deny Allow from all </IfVersion> <IfVersion >= 2.4> Require all granted </IfVersion>
# if a directory or a file exists, use the request directly RewriteCond %{REQUEST_FILENAME} !-f RewriteCond %{REQUEST_FILENAME} !-d # otherwise forward the request to index.php RewriteRule ^ index.php [L] </Directory>
# redirect to the URL without a trailing slash (uncomment if necessary) #RewriteRule ^/admin/$ /admin [L,R=301]
Alias /admin /var/www/ildis/backend/ # prevent the directory redirect to the URL with a trailing slash RewriteRule ^/admin$ /admin/ [L,PT] <Directory /var/www/ildis/backend/> AllowOverride none <IfVersion < 2.4> Order Allow,Deny Allow from all </IfVersion> <IfVersion >= 2.4> Require all granted </IfVersion>
# if a directory or a file exists, use the request directly RewriteCond %{REQUEST_FILENAME} !-f RewriteCond %{REQUEST_FILENAME} !-d # otherwise forward the request to index.php RewriteRule ^ index.php [L] </Directory></VirtualHost>Konfigurasi Nginx
Section titled “Konfigurasi Nginx”sudo nano /etc/nginx/sites-available/ildisserver { set $project_root /path/to/ildis.go.id; #set $fcgi_server 127.0.0.1:9000; set $fcgi_server unix:/var/run/php-fpm/example.socket;
charset utf-8; client_max_body_size 128M;
listen 80;
server_name ildis.go.id; root $project_root/; index index.php;
access_log /var/log/nginx/ildis.access.log combined; error_log /var/log/nginx/ildis.error.log warn;
location ^~ /backend { rewrite ^/backend(.*)$ /backend/$1 last; }
location ^~ /backend/ { root $project_root;
# uncomment the following, if you want to enable speaking URL in the backend #try_files $uri $uri/ /backend/index.php$is_args$args;
location ~ /\.(ht|svn|git) { deny all; }
location ~ \.php$ { include fastcgi_params; fastcgi_param SCRIPT_FILENAME $document_root$fastcgi_script_name; #fastcgi_pass 127.0.0.1:9000; fastcgi_pass $fcgi_server; try_files $uri =404; } }
location / { try_files $uri $uri/ /index.php$is_args$args; }
location ~* \.(?:css|js|jpg|jpeg|gif|png|ico|woff2?|ttf|svg|eot|webp|pdf)$ { expires 30d; access_log off; add_header Cache-Control "public"; try_files $uri =404; }
location ~ /\.(ht|svn|git|env|DS_Store) { deny all; }
location ~ ^/(vendor|node_modules|\.vagrant|vagrant|DATABASE|\.github)(/|$) { deny all; return 403; }
location ~* ^/(Vagrantfile|composer\.(json|lock|phar)|package\.json|\.bowerrc|\.gitignore|README.*|CHANGE.*|codeception\.yml|requirements\.php|yii(_test)?(\.bat)?)$ { deny all; return 403; }
location ~ \.php$ { include fastcgi_params; fastcgi_param SCRIPT_FILENAME $document_root$fastcgi_script_name; #fastcgi_pass 127.0.0.1:9000; fastcgi_pass $fcgi_server; try_files $uri =404; }}Lalu aktifkan config-nya:
sudo brew services restart nginxsudo systemctl restart nginx6. Edit /etc/hosts
Section titled “6. Edit /etc/hosts”127.0.0.1 ildis-frontend.test127.0.0.1 ildis-backend.testAkses Aplikasi :
- http://ildis-frontend.test (untuk frontend)
- http://ildis-backend.test (untuk halaman admin)
B. Windows dengan XAMPP
Section titled “B. Windows dengan XAMPP”1. Unduh dan Pasang XAMPP
Section titled “1. Unduh dan Pasang XAMPP”- Unduh dari https://www.apachefriends.org/index.html
- Install dengan pilihan default
- Aktifkan Apache dan MySQL melalui XAMPP Control Panel
2. Unduh ILDIS
Section titled “2. Unduh ILDIS”Clone ILDIS ke dalam folder htdocs:
cd C:\xampp\htdocsgit clone https://github.com/bphndigitalservice/ildis.git ildisAtau ekstrak file rilis dari GitHub Releases
3. Setup Proyek
Section titled “3. Setup Proyek”cd C:\xampp\htdocs\ildiscomposer installphp init4. Buat File .env
Section titled “4. Buat File .env”copy .env.example .envEdit file .env dan sesuaikan nilai dengan kredensial MySQL / MariaDB anda.
5. Import Database
Section titled “5. Import Database”mysql -u root -p ildis_v4 < DATABASE/ildis_v4.sqlAtau gunakan phpMyAdmin untuk import manual.
6. Buat Virtual Host
Section titled “6. Buat Virtual Host”Edit file C:\xampp\apache\conf\extra\httpd-vhosts.conf, tambahkan :
<VirtualHost *:80>    #ganti dengan domain anda    ServerName ildis-demo.bphn.go.id
    #ErrorLog /var/log/apache2/advanced.local.error.log    #CustomLog /var/log/apache2/advanced.local.access.log combined    AddDefaultCharset UTF-8
    Options FollowSymLinks    DirectoryIndex index.php index.html    RewriteEngine on
    RewriteRule /\. - [L,F]
    DocumentRoot /var/www/ildis/    <Directory /var/www/ildis/>        AllowOverride none        <IfVersion < 2.4>          Order Allow,Deny          Allow from all        </IfVersion>        <IfVersion >= 2.4>          Require all granted        </IfVersion>
        # if a directory or a file exists, use the request directly        RewriteCond %{REQUEST_FILENAME} !-f        RewriteCond %{REQUEST_FILENAME} !-d        # otherwise forward the request to index.php        RewriteRule ^ index.php [L]    </Directory>
    # redirect to the URL without a trailing slash (uncomment if necessary)    #RewriteRule ^/admin/$ /admin [L,R=301]
    Alias /admin /var/www/ildis/backend/    # prevent the directory redirect to the URL with a trailing slash    RewriteRule ^/admin$ /admin/ [L,PT]    <Directory /var/www/ildis/backend/>        AllowOverride none        <IfVersion < 2.4>            Order Allow,Deny            Allow from all        </IfVersion>        <IfVersion >= 2.4>            Require all granted        </IfVersion>
# if a directory or a file exists, use the request directly RewriteCond %{REQUEST_FILENAME} !-f RewriteCond %{REQUEST_FILENAME} !-d # otherwise forward the request to index.php RewriteRule ^ index.php [L] </Directory></VirtualHost>Edit file hosts:
C:\Windows\System32\drivers\etc\hostsTambahkan baris berikut:
127.0.0.1 ildis-frontend.test ildis-backend.testRestart Apache dari XAMPP Control Panel.
User Default Backend / Admin
Section titled “User Default Backend / Admin”Untuk membuat user awal anda dapat menggunakan user :
username : samplepassword: C~;4dwqWh>(!%:e,<rMembuat user dengan CLI
Section titled “Membuat user dengan CLI”Untuk membuat user dengan CLI anda dapat menggunakan command berikut :
php yii user/createKonfigurasi Tambahan
Section titled “Konfigurasi Tambahan”Cookie Validation Key
Section titled “Cookie Validation Key”Pada halaman konfigurasi terdapat entry COOKIE_VALIDATION_KEY_BE dan COOKIE_VALIDATION_KEY_FE kedua entry tersebut harus diisi untuk validasi cookie agar mekanisme keamanan dapat berjalan dengan benar.
...
#  Cookie validation keys for different environmentsCOOKIE_VALIDATION_KEY_BE=COOKIE_VALIDATION_KEY_FE=
...
Untuk generate COOKIE_VALIDATION_KEY_BE / COOKIE_VALIDATION_KEY_FE anda dapat mengeksekusi perintah berikut :
bash <(curl -s https://raw.githubusercontent.com/bphndigitalservice/ildis-helper-scripts/refs/heads/main/generate_cookie_keys.sh)$phpScript = Invoke-RestMethod -Uri "https://raw.githubusercontent.com/bphndigitalservice/ildis-helper-scripts/refs/heads/main/generate_cookie_keys.php"php -r $phpScriptGoogle Recaptcha Key
Section titled “Google Recaptcha Key”Google reCAPTCHA v3 membantu melindungi ILDIS dari bot tanpa interaksi pengguna pada halaman Login Admin (backend). Berikut ini adalah langkah-langkah untuk mendapatkan Site Key dan Secret Key dari Google reCAPTCHA v3.
Langkah-langkah Mendapatkan reCAPTCHA v3 Key
Section titled “Langkah-langkah Mendapatkan reCAPTCHA v3 Key”1. Kunjungi Halaman Admin Google reCAPTCHA
Section titled “1. Kunjungi Halaman Admin Google reCAPTCHA”Buka link berikut di browser Anda:
https://www.google.com/recaptcha/admin/createAnda harus login menggunakan akun Google.
2. Daftarkan Situs Baru
Section titled “2. Daftarkan Situs Baru”Isi form yang tersedia dengan detail sebagai berikut:
-
Label Nama identifikasi untuk project kamu. Misalnya:
MyILDIS -
reCAPTCHA Type Pilih opsi:
reCAPTCHA v3- Domains
Masukkan domain tempat anda akan menggunakan reCAPTCHA, tanpa
https://dan tanpa/. Contoh:
ildis-backend.testjdih.kemenkum.go.id-
Owners Secara default diisi dengan akun anda. Bisa ditambahkan owner lain jika perlu.
-
Accept the reCAPTCHA Terms of Service Centang checkbox ini untuk menyetujui ketentuan.
-
(Optional) Centang “Send alerts to owners” jika ingin menerima notifikasi keamanan dari Google.
Klik tombol Submit untuk mendaftar.
3. Salin Site Key dan Secret Key
Section titled “3. Salin Site Key dan Secret Key”Setelah submit, kamu akan melihat dua key penting:
-
Site Key Copy value pada bagian ini ke entry
RECAPTCHA_SITE_KEY. -
Secret Key Copy value pada bagian ini ke entry
RECAPTCHA_SECRET_KEY.
Referensi :